![tradable-bits-long-logo-for-download.png]](https://resources.tradablebits.com/hs-fs/hubfs/tradable-bits-long-logo-for-download.png?height=40&name=tradable-bits-long-logo-for-download.png)
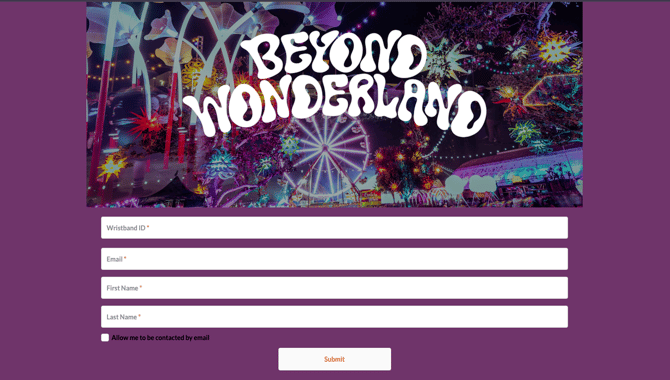
The Incentivize with atVenu campaign is a simple promotion distribution system that lets fans sign up for event-day discounts and promotions through a simple entry form that will apply to their registered wristband or delivered as a scannable QR code for use at any atVenu POS.
After fans purchase tickets, they can use this campaign to register their wristband's unique ID, or, if your event doesn't use wristbands, instantly generate a QR code to load the promotion. You can run this real-time campaign in advance or live on-site to capture last-minute registrations while fans wait in line at an atVenu POS vendor!
When to use Incentivize with atVenu
1. Optimizing Sponsor Sampling:
Leah, Director of Partnerships for a new comedy festival, needs to give her sponsors “proof of value” and database insights. By connecting their merchant store to her festival's Tradable Bits account, sponsors can offer fans on-site discounts in exchange for campaign entry. Leah's sponsors get a clear view of exactly who interacted with them on-site, allowing for personalized post-event follow-ups.
2. Uncovering Hidden Fans
Melanie, Marketing Director of a major music festival, wants to capture data on the "+1s" attending her festival who didn't buy the original tickets. She gates a high-value incentive (like an 80% off drink) behind the campaign. Since +1s likely don't have registered wristbands, she uses the QR code delivery option. Fans enter on their phones, scan their code at a vendor, and Melanie seamlessly captures their profiles and opt-ins for her marketing lists.
We're outlining some campaign-specific details below. Follow this guide for more info on General Setup and other campaign basics.
Campaign Set-Up:
You will need to set up your own atVenu account before configuring an Incentivize campaign.
Note: From your atVenu account, collect your API Key and Host URL and pass this to your Customer Success Manager to set up your details. Once your CSM has confirmed this has been completed, you can begin building your campaign.
Configuration
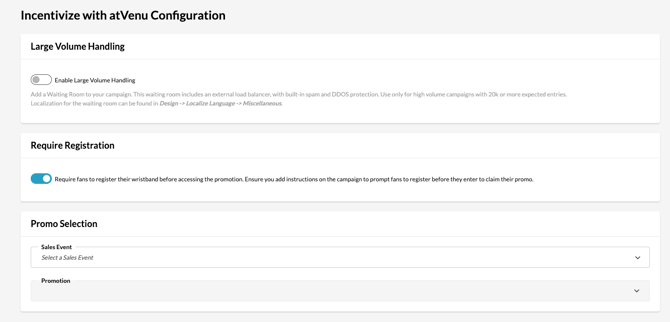
Use this section to customize campaign functionality and how it appears to users.
- Large Volume Handling: toggle this on to include a waiting room for fans if you are expecting more than 20, 000 fans at once. Use discretion when applying this feature, as it will create an extra step for fans
- Registration & Delivery: Determine if you want to require fans to pre-register their wristbands before accessing the promotion, or opt for QR code delivery to seamlessly reward fans without requiring wristbands at all.
- Promo Selection: select the sales event and the specific promotion that you want to offer through your Incentivize with atVenu campaign. The promo selection fields query directly to atVenu, so you will need to configure your sales events and promotions in your atVenu account first to have them populate in the selection dropdown menu
Automatic Email
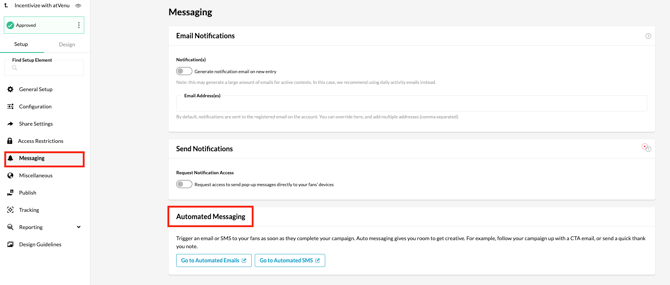
To set up an automatic email sent to fans after they have entered, go to Messaging> Automated Messaging
In this section, you can customize the email header, text, subject line, and ‘from name’ of your automatic email.
Before publishing your campaign, be sure to review our Campaign Publishing Checklist for a smooth launch.
Still need assistance? Please reach out to your Customer Success Team or contact support@tradablebits.com