Engagement Campaigns are your ticket to your fans' hearts and some of that sweet sweet first-party fan data.
Check out some examples of Engagement Campaigns here.
The Tradable Bits campaign builder is divided into two core sections: Setup & Design, each with their own subsections. While most campaigns follow the same flow, certain configurations are specific to individual campaigns. For specific guides on each of our campaigns, please visit our resource hub, where these differences are clearly outlined.
This guide will outline a few core set up areas that are found on the majority of campaign types.
Creating your first campaign
- In the Tradable Bits Homepage, hover over the Campaigns section in the Top Navigation Bar, select your desired business and click on Dashboard.
- Click on New Campaign on the top right corner

- Choose your desired campaign from the list of options presented. You can choose a campaign type by clicking from the list or by searching for the campaign type in the search bar

- Complete the required fields in the pop-up window to finish creating your campaign.

- Proceed through the campaign, set up the sidebar on the left to design and configure each section of your campaign

Setup
General Setup
Campaign Name
- Campaign Name: This is where you will name your campaign.
- Campaign Public Name: Here you can create a different external name for the campaign that your fans will see on their browser. If you choose not to create a public name, it will default to your Campaign Name.
- Campaign Labels: Add custom labels to help you sort and search for your campaigns.

Start & End Time
- Start & End Date Time: This is where you will set the period when you would like your campaign to be active and accept entries from fans.
Note: The campaign needs to be live even if you just want to test it internally.
- Timezone: The timezone that you would like considered for the aforementioned Start Date/Time & End Date/Time. The Default Timezone of the platform is PST.
- Countdown Timer: This toggle will enable or disable the display of a countdown timer to when the Campaign is scheduled to go live. Once the campaign has started, the Countdown time will count down the time left for the campaign to end.

Authentication
- Auth Network: Allows fans to authenticate using their social network credentials. If this is chosen, fans can authenticate using their network credentials or using their email. By enabling different authentication networks, you can get access to more data from the network such as Affinity, etc. Authentication options include:
- Tradable Bits
- Spotify
-
- Amazon

Note: Connecting using Auth Network will not work for embedded campaigns. Additionally, this option must only be used if you have a Custom App created for your Business. If you need help setting up your Custom App, please reach out to your support@tradablebits.com.
Certain campaigns have an Auth Network set as mandatory as the Network is important for the campaign to function. For example, Personalized Playlist requires Spotify to function and hence Spotify is set to be mandatory and cannot be changed.
Entry Form Fields
Every Tradable Bits campaign automatically includes a entry form field section designed to capture valuable first-party data from your fans.
The following three fields are required for all campaigns by default:
-
Name
-
Email Address
-
Subscription to Email
You can easily enrich the data you collect by adding more fields:
-
Click Additional Fields to expand your options.
-
Add more Standard Fields (like phone number or location).
-
Create Custom Fields to capture highly specific information tailored to your campaign goals. For more information on how to set up custom fields, visit this guide here.
Once you get more comfortable setting up campaigns, we also recommend setting up default form fields that will automatically be applied to all your future campaigns.

Verification
- Require verification for Email or SMS: Toggle this one if you'd like fans will be sent a verification code to verify their details

Legal Setup
This section allows you to manage the specific legal agreements such as the Privacy Policy, Terms of Use, and Official Rules that apply to your campaign.
1. Adding Legal Text
-
You can directly enter your campaign-specific legal text into the provided fields.
-
Alternatively, you can toggle on the option to use a Custom URL to link directly to your external legal documents.

2. Using Default Legal Documents
If you plan to use your standard legal text:
-
Simply click Populate From Defaults. The system will automatically retrieve the legal language you previously entered in your Business Default Settings. You can learn more about these and other Default Settings here.

3. Consent & Opt-Outs
Use the following setting to manage fan acceptance of your rules:
-
Always require new legal consent: Toggle this setting ON if you want fans to accept your Official Rules, Terms of Use, or Privacy Policy on every entry.
If you leave this setting OFF, fans will only be required to accept the legal rules on their very first entry into the campaign. The consent prompt will not reappear for subsequent entries.
- Show Opt-out Links: You also have the option to show opt-out links so fans can easily manage their preferences and opt-out of communication.

Sweepstakes
Sweepstake allows you to award fans with extra entries into a secondary sweepstakes for each action they complete. You can manage sweepstakes winners in the Reporting Section of your campaign. You have the option to reward fans if they:
- Watch a youtube video
- Click a link
- Opt-in

Configuration
The configuration section contains items that need to be set up for the campaign to run effectively. Depending on the campaign type, there may be additional options under this section.
- Waiting Room: Enable a waiting room to protect high-traffic campaigns from DDOS attacks and large volume. A default room will automatically activate at 50+ entries/sec for system stability.
- Entry Fields Format: Change this setting if you'd like to change the layout of the fields to be stacked vertically or horizontally.

Share Settings
Share Link
- Hide Campaign Share Button: Toggle this on if you'd like to not include share button at the bottom of the campaign.
Share Message
- Share Image: Add an image to display when fans share your campaign link.
- Share Title: Add a custom share title that appears when fans share your campaign link.
- Share Description: Add a description that accompanies your share title.
Note: If you choose not to add a Share Image or Share Title, the image will default to the Tradable Bits logo and the title will default to your Campaign Name/Public Campaign Name

Content
This is where you will upload all necessary assets and create your campaign content. The required content fields and structure will automatically adapt based on the specific campaign type you have selected. For detailed guidance on each campaign format, please refer to the dedicated help guides.
Access Restrictions
Password Protection
While a campaign is in draft mode, all test data collected is deleted after 24 hours. To protect your draft mode campaign, set up a password.
Note: Draft mode campaign URLs are still visible to the public. This password feature automatically turns off when you set your campaign to the “approved” mode.
Regional Restrictions
Choose to Limit campaign access by geographic location. Define by region or by lat/long + specific radius. Only one restriction type may be used at a time.


Age Gate
Specify a minimum age for fans to participate. This feature is essential for ensuring regulatory compliance when running sponsored campaigns for Alcohol/Tobacco partners or when setting age gates for campaigns targeting children aged 13 and over.

Music Stream Gate
Require fans to click through a music streaming link before accessing the campaign. If enabled, you must provide at least one DSP link, such as a playlist or song link (either Spotify, Apple Music, Amazon Music or Deezer).

Bot and Spam Protection
- Enable Spam Protection: This toggle blocks entries from a single IP where there are over 20 attempted entries in 24 hours from that IP address. May need to be disabled for in-venue activations or while internally testing your campaign.
- Enable Bot Protection: Bot Protection is a stricter version of Spam Protection, which uses behavioural patterns to identify possible automated or invalid attempts and block them before they’re accepted. This feature can be used with or without spam protection. Allowlisted IP addresses are excluded from both protection mechanisms. When bot protection is disabled, the system will still flag questionable entries, but no action is taken to block the attempt. You can review the status of bot detection on the campaign Results page.
Entry Limits
- Limit Total Campaign Entries: Enable this to set a maximum total number of entries allowed. Once this limit is reached (ex. 500 entries), the campaign will automatically close to further submissions.
- Limit Fan Entries: Toggle this on to set the campaign entry limit for each fan. You have the option between choosing a daily or lifetime limit.

IP Management
IP Management gives you precise control over which users can access your campaign by allowing you to ban or approve specific IP addresses. Simply click the appropriate button and input the IP address or an entire network range using CIDR notation.

Messaging
- Email Notifications: Toggle this on to generate a notification email on new entry. Ensure you add the email address you'd like the notification to be sent to. By default, notifications are sent to the registered email on the account.

- Request Notification Access: Request access to send pop-up messages directly to your fans’ devices.

- Automated Messaging: Trigger an email or SMS to your fans as soon as they complete your campaign. Auto messaging gives you room to get creative. For example, follow your campaign up with a CTA email, or send a quick thank you note. For more information visit these help guides on Getting Started with SMS Planner and Getting Started with Auto Emails.
Miscellaneous
- Tag Participants: Automatically tag participants based on their interactions. Input your tag here and save.

- Trigger Endpoint Push: Toggle this on if you'd like to enable an integration with your CRM, email provider etc.

- Point Awards: Fans can be awarded points for completing campaigns. You can designate a specific point category where these earned points will be pushed for aggregate display and reporting. Additionally, customize the number of points a fan receives for their participation.

- Idol/Sponsor Affinity: When a fan interacts with your campaign they will be assigned to an Idol. For more information on Idols, visit our guide on creating new Idols.

Tracking:
Disable Cookie Warning:
Every campaign has a cookie warning that's displayed at the bottom of the browser. This warning is to allow fans to get more insight into how their data is being used. This toggle will allow you to disable that warning. For more information on the Cookie warning, visit this guide. Note: Please do not disable this unless necessary. Disabling this goes against regulations in most countries.
Publish:
The publish section houses all the info, links and scripts you need to share or embed your newly created campaign. Again, these options will vary slightly by campaign type but every campaign automatically generates a microsite link and a QR code.
Whichever method you use to publish your campaign, we highly recommend using your own virtual domain so that it contains your brand's URL and feels more cohesive and trustworthy for your fans! More info on setting up a virtual domain here.
Here's an overview of other possible options you may have as you build more campaigns:
- Standalone Microsite - Our system generates a website for every campaign you create. The simplest way to promote your campaign is to share this link, which is optimized for all major browsers and devices.
- Embed on Website - All Tradable Bits campaigns can be embedded directly to your website, blog or another HTML-friendly site
- Native Embed - You can embed your campaign into your native Android or iOS app using the link and additional parameters provided in this section. Your campaign will appear to be part of your existing app so fans may find it while browsing. Your social authentication can also carry over from your app to your campaign.
- QR Code - Our system generates a unique scannable QR code for your campaign. Your fans can scan the QR code using their phone's camera app or a dedicated QR scanning app and it will trigger a notification to open the campaign, launching the campaign standalone microsite.
- Live Results - For specific campaigns, display campaign results live to your audience on the big screen using the Live Results URL. You can publish live results for: Poll, Tug of War, Photo Contest, Image Trivia, and Memory Game. To configure the live results page, please see the miscellaneous section of this guide.
2. Design
There are 3 core tabs under the design section that allow you to customize the look and feel of each page of your campaign:
- Theme Settings
- Customs CSS/JS
- Localize Language
Theme Settings:
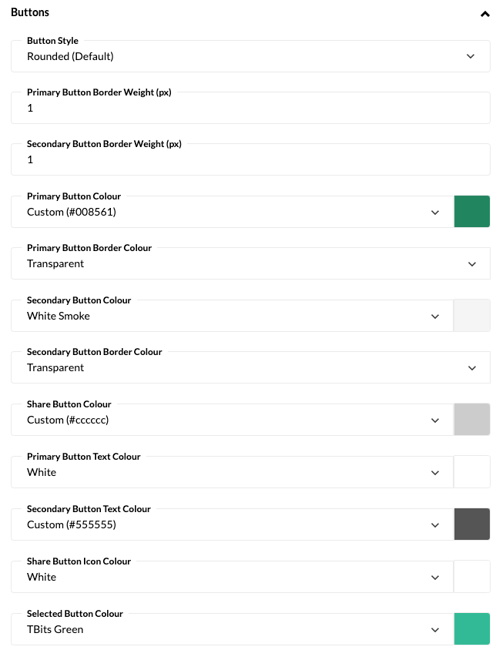
This is where you can change the colour of your buttons, font and other campaign elements like timers, the cookie warning, or upload your own background and favicon images.
Custom CSS/JS:
You can successfully build and launch any of our campaigns without any additional coding but for those that are a bit more code-savvy and want to add certain customizations to the look of the campaign, you can add your own code right into the campaign builder.

Localize Language:
Your fan base is diverse and you need to be able to engage with them in the most authentic way possible, starting with speaking their language-literally. Tradable Bits currently supports campaigns built in English, French, Arabic, Chinese (Simplified &Traditional), Dutch, German, Japanese, Korean and Spanish.
You can add one of these languages to your campaign by hitting the + New Language button and selecting one from the dropdown. From there you can either leave our default translations or add your own to make the language sound more like your brand voice.
Once a language is added to the campaign, the fan's browser will automatically detect it and display the language that the fan uses in their browser.
Learn more about our language options here.
For detailed instructions on customizing localized language, please refer to this help guide.

Pages:
A campaign is made up of several pages that a fan will flow through as they enter your campaign. Our campaigns have a standard five pages but you can toggle on additional pages such as an auth gate page for your campaign.
Click through each page and add the necessary assets to build the campaign out exactly how you want it.
Some key areas to know as you move through these pages:
-
Header
This image will appear at the top of the page.
Pro tip: upload a transparent header so that the background image you choose for your campaign will shine through. Example below:

- Description
The description appears under your header. You can use it to describe the contest or to entice fans into participating!
"Are you a Knxwledge super fan?
That's all for now! As you build more campaigns, you'll discover many other areas of the campaign builder that will let you further customize how a fan engages with your campaign but this will get you started on the building basics!
Still need assistance? Please reach out to your Customer Success Team or contact support@tradablebits.com