How do I change the opt-in language on my campaign?

Here's a quick guide on how to change your opt-in language at a business and campaign level.

What is Opt-In?

Opt-in is the process of obtaining consent from your fans to receive marketing communications. This ensures you are communicating with fans who have agreed to hear from you, which can improve engagement and allows you to maintain compliance with your region's privacy laws.

For more information on making opt-in mandatory, please refer to this help guide.

Business vs. Campaign Localized Language

Opt-in language can be customized at both the business and campaign levels.

Business Localized Language

When you localize business language changes apply to all engagement campaigns within that business. 

For example, if you have standard legal consent wording for marketing opt-ins, setting this at the business level ensures it's used consistently across all your campaigns.

Campaign Localized Language

Localizing campaign languages changes only affect the specific engagement campaign.

For example, if you want to use different opt-in language for a specific contest campaign that differs from your standard business language, you would localize the language at the campaign level.

How to Localize Business Opt-In Language

1. Go to your desired Business

2. In the left-hand menu, select Business Settings > Localize Language

In the left-hand menu, select Business Settings > Localize Language

3. Once on the Localize Language page, scroll down to the Entry Form section

Business Opt in Step 3

4. Choose to edit either the Email Subscribe (subscribe_email) or Phone Subscribe (subscribe_phone) text

Business Opt in Step 4

5. After editing the text, scroll to the top and click Save

6. You can now add these fields to your campaigns to collect opt-ins with your customized language

Business Opt in Step 6

How to Localize Campaign Opt-In Language

1. Go to your desired Campaign

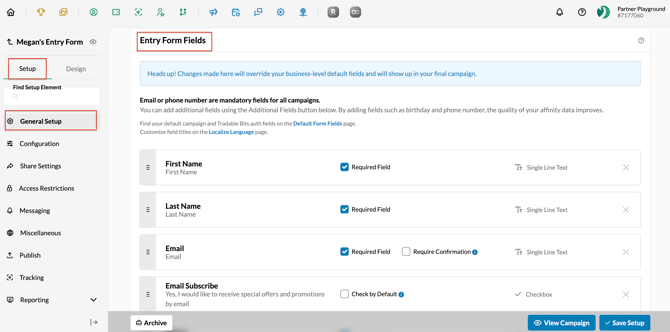
2. Navigate to Setup > General Setup and scroll to Entry Form Fields.

Navigate to Setup > General Setup and scroll to Entry Form Fields.

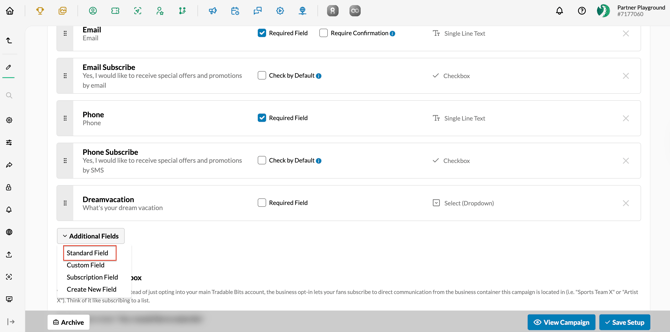
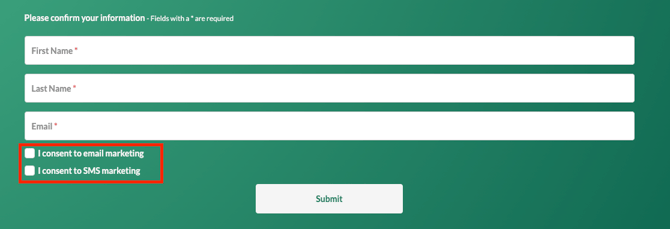
3. To include Email Subscribe or Phone Subscribe options, click Additional Fields > Standard Field.

To include Email Subscribe or Phone Subscribe options, click Additional Fields > Standard Field and select either Email Subscribe, Phone Subscribe, or both.

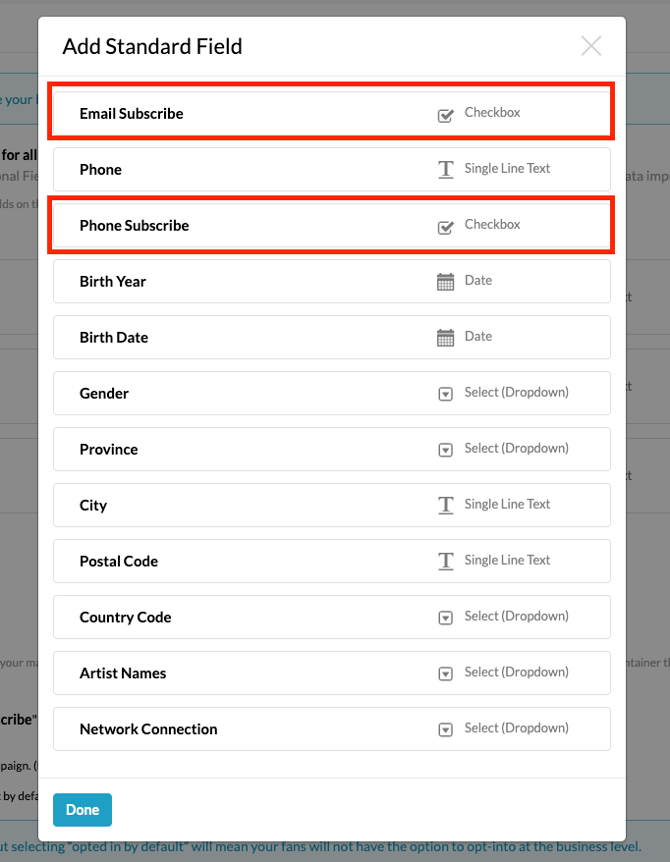
4. Select either Email Subscribe, Phone Subscribe, or both.

Campaign Opt In Step 4

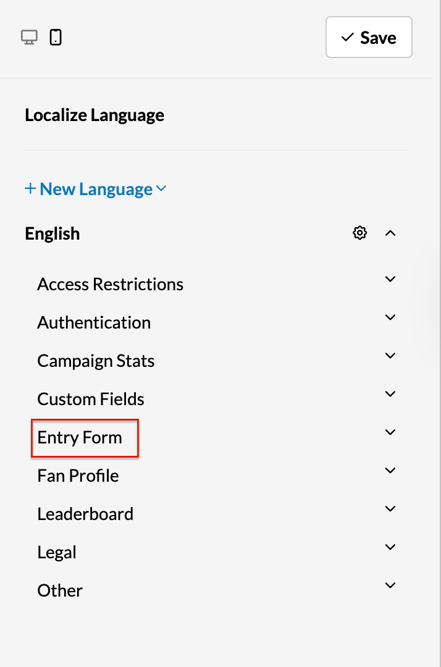
5. Once these entry form fields are added to your campaign, go to Design > Localize Language

Once these entry form fields are added to your campaign, go to Design > Localize Language

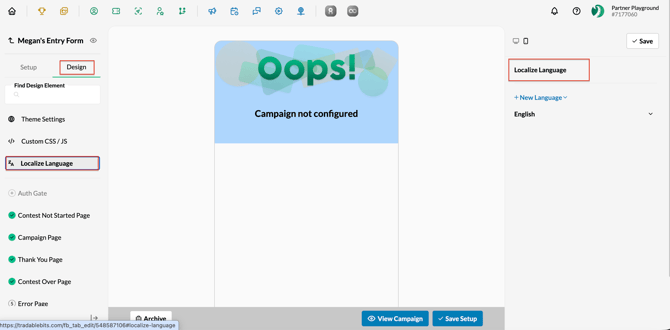
6. On the right side menu, choose your preferred Language. A dropdown menu will display categories of fields, click your Entry Form.

On the right side menu, choose your preferred Language
A dropdown menu will display categories of fields, click your Entry Form

7. Click into Email Subscribe and/or Phone Subscribe and add your desired text/phrasing

Screenshot 2025-05-30 at 12.06.04 PM

8. Click Save in the top right corner

9. Click Save Setup on the bottom right to ensure all your changes are saved

Check your campaign

For more information, check out this help guide on localized language and use cases.


Still need assistance? Please reach out to your Customer Success Team or contact support@tradablebits.com