![tradable-bits-long-logo-for-download.png]](https://resources.tradablebits.com/hs-fs/hubfs/tradable-bits-long-logo-for-download.png?height=40&name=tradable-bits-long-logo-for-download.png)
To complement your existing email marketing strategy, Tradable Bits offers the ability to send transactional email campaigns to groups of fans who complete certain actions in real-time.
Every Tradable Bits subscription includes up to 100K email sends "out-of-the-box". You can build any of your email campaigns drag-and-drop style, including:
- Basic Emails: Use the FanCRM to search and segment your desired audience of fans, and save them as a snapshot or filter. From there, you can set up a basic email to send to this audience that you can design using our drag-and-drop email editor.
- Auto Emails: Trigger an automatic email on the back of a campaign entry, a purchase, or a cart event to set up simple, but effective workflows.
- Automation templates: You can preset custom email templates to use with your "if x, then y" style automations based on campaign entries, purchases, or ticket scans.
When you want to send transactional emails to a specific Tradable Bits audience, we've made it easier by eliminating the need to set up tags/filters and sending them to your third-party ESP.
Configuring Your Email Campaigns
To get started, head to the Messaging section from the top menu bar.
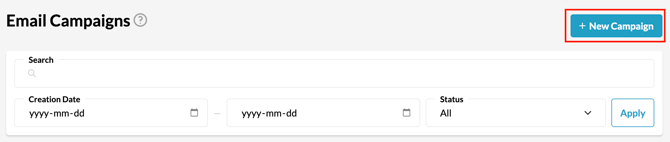
1: Begin by selecting the New Campaign button at the top right of the Email Messaging page.
2. Select the email campaign or template that you would like to create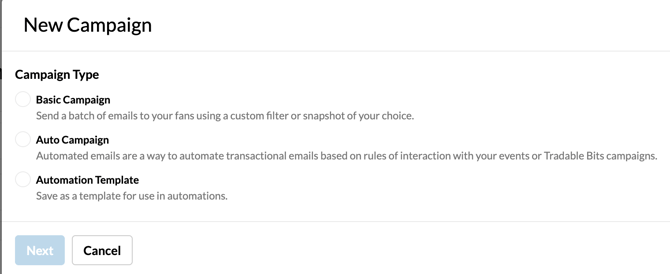
Check out these guides for detailed setup on each campaign type:
3. Filter Type: There are two audience segmentation types to choose from
- Filter: a segmented audience based on the FanCRM search parameters you choose [dynamic audience view]
-
Snapshot: a 'snapshot' of an audience filter from a single point in time [static audience view]
4. Build your email campaign
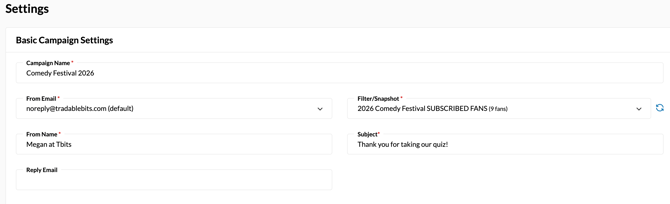
From Settings:
-
Choose a Campaign Name
- Set your From Name and From Email
- Set your Reply Email
-
Choose your audience: You will be prompted to choose a Filter or Snapshot in a drop-down menu. The menu will display ALL of your saved filters or snapshots to choose from. Select your preferred audience.
- Input your Subject Line
This is the subject line that your fans will see in their email inbox.
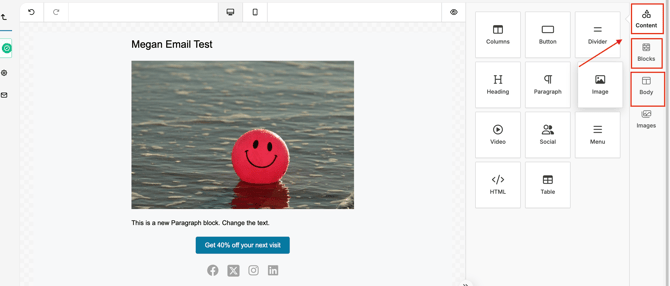
Then, choose Email Editor from the left menu to customize your email template and add your content:
- Drag and drop the elements you wish to include in your email from the Content tab at the top right
- Use one of the pre-created block formatting options from the Block tab
- Choose your colours, fonts, accessibility settings, and design from the Body tab
-
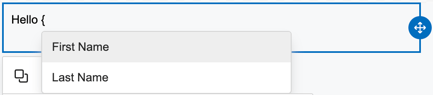
Add personalized fan details directly into any text element (headings, paragraphs, etc.):
- Simply type { while editing text to open a prompt with First Name and Last Name options.
-
- Selecting an option will automatically insert merge variables (e.g., [first_name]) that dynamically populate with the recipient's CRM data upon sending.
Setting up your Automation Templates
If you'd like to set up an automation to send an email message when a trigger activity occurs, such as a purchase, campaign entry, or scan, we'd recommend creating a customized automation template. These are set up in the same way you'd configure an email using the Settings and Email Editor sections noted above.
When you'd like to create an automation where you'll use your new template, you can do this from the Automations section in the left Messaging menu. Learn more about how to set up your automations in our Getting Started with Automations guide.
Still need assistance? Please reach out to your Customer Success Team or contact support@tradablebits.com
