Default settings are settings you configure once, that are then applied to all engagement campaigns in the selected Business (i.e the Business you're in when you're setting up default settings). This saves time by pre-filling any repetitive settings like legal setup or social media links in your campaign setup.
How do Default Settings Work?
Default settings will automatically apply to any new campaign built in the selected business. You can override any defaults set on the business level within a specific campaign by editing CSS, Regional Restrictions, etc in that campaign. These edits will override your business default settings.
How to Configure Default Settings
-
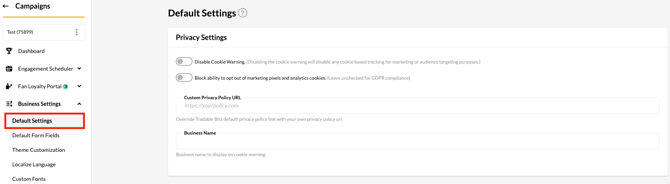
In the Tradable Bits Homepage, hover over the Campaigns section in the Top Navigation Bar, select your desired business for which you would like to configure default settings, and select Dashboard.
-
Expand the "Business Settings" option from the menu on the left, and click on "Default Settings"
- Configure the settings of your choice from the options below.
Google/Facebook External Add-ons:
Set up your Google Tokens and Facebook Ad Pixels in this section to retarget participants later if needed.
Idols Affinity:
Fill this section out if you intend to use the "business" as a way to manage interactions with a specific artist. For example, if you are a label client, and you have built out businesses for all of the artists under your roster.
When fans enter a campaign in this business, no matter what kind of campaign it is, we will apply an affinity measure to the artist(s) you add to the "Idols" field
So for example, if my Business was for TBits Asha (the greatest lyricist of 2023), and I added "TBits Asha" as an idol in the Idols Affinity section, then whenever a fan enters any campaign built in the TBits Asha business, they'll be labelled as having an interest in the artist - TBits Asha.
Legal Setup:
If you use a pretty standard Privacy Policy, Terms of Use and Official Rules across campaigns, then configure those fields here and simply click on "Populate from Defaults" when building individual campaigns. This will save you time.
If you have campaign-specific Privacy Policies, Terms of Use or Official Rules, there are fields provided in campaign setup, where you can override default settings. If these fields are set up, mandatory checkboxes are created for every campaign which prompts fans to agree to your terms and conditions.
Auth Service:
For the technical setup of Auth Service, visit the Authentication Service tab on the left nav bar. That is where you can set details like who your email verification is coming from.
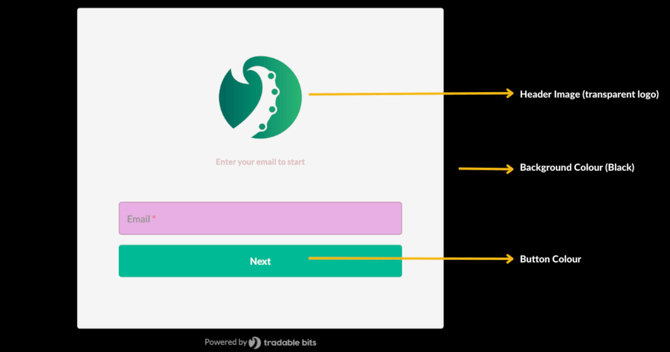
This section is where you set up how your Auth Service looks.
As an example image below, the Authentication Service process for fans looks like a little pop-up where they fill in their details. Use this section to set a header image (we recommend using a transparent image of your logo), the background colour and the button colour.
Styling:
This is where you can set up a favicon image, and campaign background (whther that's an image or video). This way you can skip steps in theme customization when it comes to individual campaigns.
Custom CSS/Javascript:
This section allows you to customize CSS or Javascript that you'd like automatically applied against all of your campaigns.
Regional Restrictions:
Use this section to apply regional access limitations to all of the campaigns built within this business. For example,if that you only want fans in the UK to be able to access any campaign in this business, you would add all of the regions in the UK that you'd give campaign access to.
Social Media and Website Links:
You can display buttons at the bottom of your campaigns that will link back to social accounts, or to your website. This section is where you input the links for each of your social channels. Once you have the links established for this business, you can style these buttons in the Theme Customization section of campaigns.
Still need assistance? Please reach out to your Customer Success Team or contact support@tradablebits.com