Before you begin, ensure that you have access to both your Klaviyo and Tradable Bits accounts.
Why connect Klaviyo to Tradable Bits?
By syncing your accounts, you're able to seamlessly push the fan data and contacts collected through Tradable Bits, directly to your existing Klaviyo account to streamline your email marketing initiatives.
Set Up:
Klaviyo Side:
First, you must create the API Key:
1. Begin by logging in to your Klaviyo account
2. Using the menu in the bottom left of the screen, click on your account name, then navigate to Settings>API Keys

3. Click “Create Private API Key”
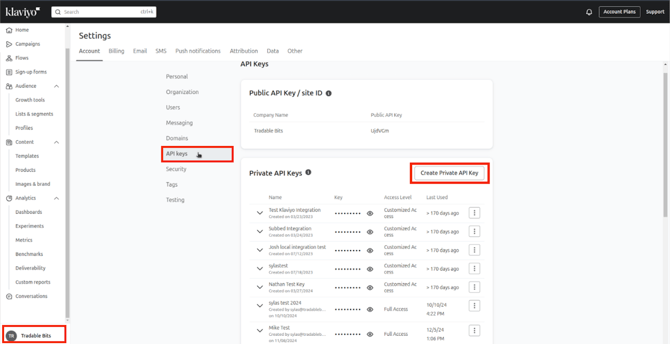
4. Give your API Key a name and select Full Access Key
- If your organization has specific rules regarding Klaviyo integrations, create a custom key with Read/Write permissions to List, Profiles, Tags, and Subscriptions and only Read access to everything else.

5. Click Create in the top right corner to generate the API Key
Take note of your new API Key and save it in a secure place. You will need this key to complete set up on the Tradable Bits side later.
Next, you will need to create the List:
6. Head to the sidebar menu and navigate to Audience>Lists & Segments to begin creating the List
7. Click Create New in the top right corner and take note of the List Name as it will be required later. Your new List will appear at the top of the Lists & Segments page.
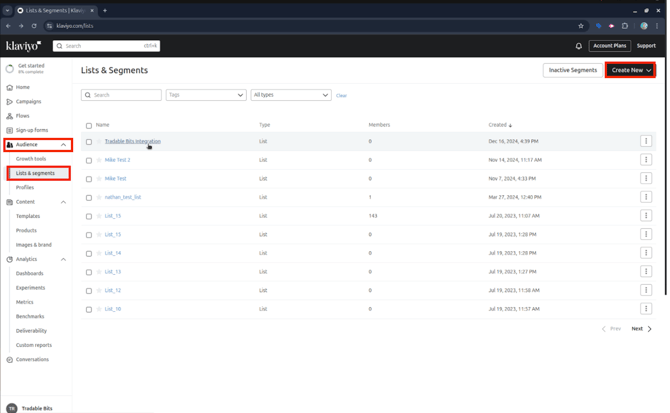
Please ensure that your List has single opt-in turned on so that subscription status can pass seamlessly from Tradable Bits into Klaviyo.
8. Click on your new list at the top of the page 
9. Navigate to Settings>Consent to confirm that Single Opt-In is checked instead of Double Opt-In

That's all on the Klaviyo side, now you can move on to completing the set up on the Tradable Bits side!
Tradable Bits Side:
1. Begin by logging in to your Tradable Bits account and going to the Top Navigation Bar
2. Click on Integrations from the account dropdown

3. Select Outgoing Integrations and click the +New button at the top of the page
4. Select Klaviyo from the dropdown menu

5. Input your List name and API Key that you created and noted down earlier into the below setup fields
6. Hit Save

7. Test your integration to ensure proper connection
![]()
Still need assistance? Please reach out to your Customer Success Team or contact support@tradablebits.com