This quick guide will walk you through connecting your Braze account to Tradable Bits for a seamless data transfer.
Before you begin, you will need access to both your Braze and Tradable Bits accounts.
Set Up Steps:
We will begin on the Braze side then finish the set up on the Tradable Bits side!
Braze Side:
- Begin by logging in to your Braze account and take note of the region cluster that you're logging in to

- Match your region cluster to Braze's REST Endpoints here or in the chart below. In this case, US Cluster 03 = Instance US-03. Note down your corresponding REST Endpoint and save it for a later step on the Tradable Bits side

- Navigate to Settings>APIs and Identifiers from the left side menu
-png.png?width=688&height=450&name=image%20(5)-png.png)
4. Select an existing API Key or if you need to create a new one, hit the Create API Key button in the top right of the page. This will be your API Key
Note down and save this key somewhere secure as you will need it later to complete the set up on the Tradable Bits side
If you are creating a new API Key, be sure to allow all permissions:
That's it for the Braze side set up! Now, head to your Tradable Bits account to finish the set up.
Tradable Bits Side:
1. Login to your Tradable Bits account and click on your account details in the top right corner
2. Select Integrations from the dropdown menu

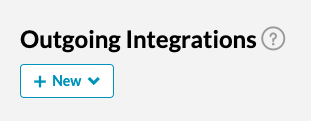
3. Select Outgoing Integrations from the menu on the left
4. Hit the +New button and select Braze from the dropdown menu

5. Give your integration a name and input your cluster Rest Endpoint and API Key that you saved from steps 2 and 4 of the Braze-side set up

6. Test your integration to ensure proper connection

7. Once connected, fans will be pushed into Braze with a custom attribute of “tbits_endpoint_name” set to the name of the integration.
That's all! If you need further assistance setting up your Braze integration, please reach out to your Customer Success team or contact support@tradablebits.com

