Run Hyper-Targeted Ads with Ease
Snapchat Ads are a great way to target a different demographic on a medium with a high level of engagement and activity.
The How
When you arrive at the Manage Centre of Tradable Bits, you’ll find your Snapchat Ads Tools on the right side of the UI in the ‘Market Smarter’ section, under Ads Planner.
Adding an Account
To add a new Snapchat Ad Account, follow the steps outlined below.
-
In the Tradable Bits Homepage, navigate to the Ad Campaigns modal, click + Add Account and select Snapchat Ads.
-
Click "Grant Permissions" on the page that pops up and approve the necessary permissions.
-
Once done, choose the Ad Account from the dropdown and click "Add Account".

Adding Media for Ads
Before you configure campaigns, you'll need to upload the media that can be used in your creatives and ads.
-
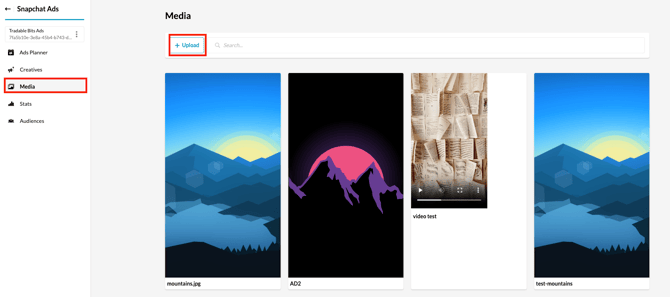
On "Manage Center", click on the Snapchat Ad Account that you would like to run ads from.
-
Select "Media" from the menu on the left and then click "Upload".
-
Enter the following details in the modal that pops up
- Name: A name to help you identify the image/video once uploaded.
- Media Type: Choose between image/video.
- Upload: Upload the asset to use. -
Click Save once done.
Building Creatives
Once you've added your media, you can build creatives to be utilized in your ads. In case you haven't already configured your media, you can still configure the media within this section.
-
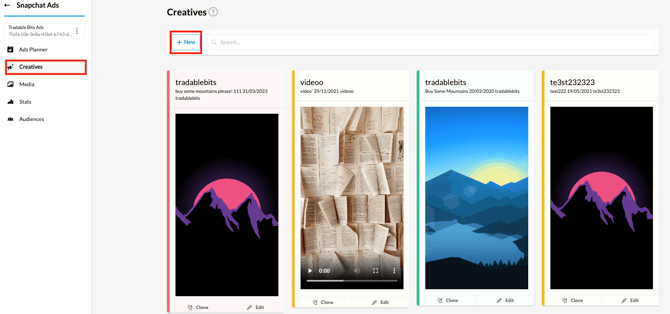
Select "Creatives" from the menu on the left, and then click "New".
-
Enter the following details in the modal that pops up
- Headline: Up to 34 characters
- Brand Name: The brand name associated with the ad.
- Shareable: Toggle this if you would like for the ad to be shareable.
- Media: If you've already configured the media to be used, then choose the same from the dropdown, if not, enter the following details.
- Name: A name to help you identify the image/video once uploaded.
- Media Type: Choose between image/video.
- Upload: Upload the asset to use. -
Click Save once done.
Creating Ads
Once you've configured your creatives, you can get started on building your Ads within Snapchat Ads Planner to prepare them to go live.
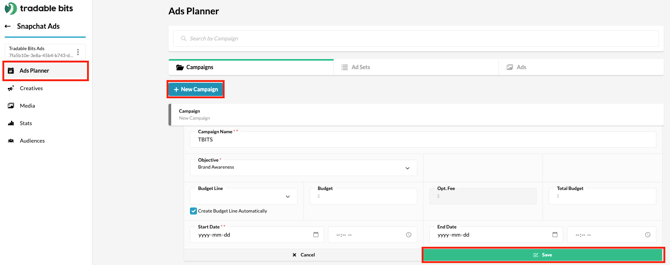
1) Select "Ads Planner" from the menu on the left.
2) Click New Campaign and enter the following details in the modal that pops up.
-
Campaign Name: A name for the campaign that would help you identify the campaign once it has been configured.
-
Objective: The intended goal of the Campaign, which enables Snapchat to optimize the delivery of ads.
-
Spend, Opt Fee & Total Budget: Total Budget refers to the total budget spent on the campaign which includes the actual Ad Spend on Snapchat as well as the Opt Fee Charged by Tradable Bits on the Ad Spend. The Opt Fee & Spend is automatically calculated based on the amount you enter in Total Budget.
-
Run Dates: The run date of the campaign.
3) Click "Save" once done.
4) Click the Ad Sets button at the top and then click the "New Adset" against the corresponding campaign.
5) Enter the following details in the modal that appears.
Campaign Name: A name for the Ad Set that would help you identify it once it has been configured.
Start Time & End Time: The timeline of the Ad Set.
Pixel: The pixel that you're using for the campaign
Lifetime and Daily Budget: Entered allocated daily budget or lifetime budget.
Max Bid: Enter the maximum amount to bid on a particular audience.
Age, Gender, Country, Regions & Metro Areas: Demographic information to use for targeting.
Regulated Content: If your creative or the product being advertised requires age restrictions (e.g. gambling-related content, alcohol, etc.) please check the box next to 'Regulated Content.’
Targeting Expansion: Expands the target audience that you've created to find more similar users.
Snapchat Lifestyles: Allows you to find more relevant audiences based on certain psychographic traits.
6) Click "Save" once done.
7) Click the Ads button at the top and then click the "New Ad" against the corresponding Ad Set.
8) Enter the following details in the modal that appears.
- Ad Name: A name for the Ad that would help you identify it once it has been configured.
- Creative: Choose a creative that you would like to use for the ad from the dropdown.
9) Click "Save" once done.
If you have any further questions about the Ads Planner, feel free to reach out to your Digital Ads Specialist.
Happy Advertising!
Still need assistance? Please reach out to your Customer Success Team or contact support@tradablebits.com