When fans participate in your campaign, our system collects and stores their information in the Fan CRM. If you want this information pushed to your Email marketing service, you will need to set up an integration.
As of November, 2017 all MailChimp sign-up forms use a single opt-in. This will subscribe your fans automatically unless you go in and setup a secondary action to do the double opt-in method on MailChimp.
If your company is located within Canada please complete Part 1 before proceeding. If your company is located outside of Canada, you may proceed to Part 2 but please check your country's anti-spam legislation before proceeding.
Set Up Steps:
Part 1: Mailchimp List Setup Steps:
- From your Mailchimp Manage Centre click on the Audience menu option and select Tags
- Create a new Tradable Bits tag that you want to add new Tradable Bits fans into
- Once created, click on Settings and then List Name and Defaults
- If you scroll down you will see a Form Settings section
- Switch the "Double Opt-In" feature on. This will send any new fans added to this list an email to confirm that they meant to subscribe to receive emails and fans will then have to explicitly subscribe, protecting your team from any violations of Canada's Anti-Spam Legislation

Part 2: MailChimp API Key Retrieval Steps:
- Within MailChimp click your Profile > Account > Extras > API Keys
- If you have no API Keys created already, click the Create A Key button
Note down and save this key somewhere secure as you will need it later to complete the set up on the Tradable Bits side

Part 3: Tradable Bits Side:
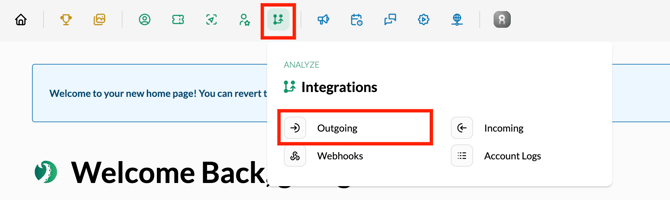
1. Login in to your Tradable Bits account and click on Integrations using the Top Navigation Bar
2. Select Outgoing from the dropdown menu
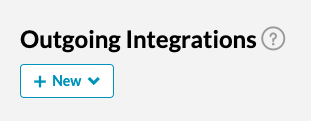
3. Hit the +New button and select Mailchimp from the dropdown menu
4. Input your list name and input the API Key that you securely stored from Part 2
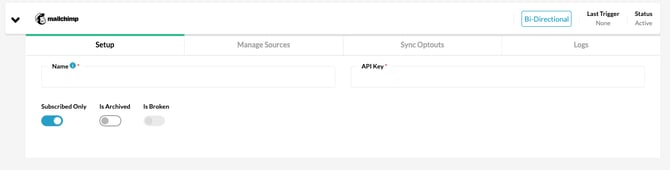
5. Click into the Manage Sources tab to select the sources that you want pushed over to your Mailchimp account. Click add
6. Test your integration to ensure proper connection

Note:
- If your Email or CRM integration is not in the "Available Integrations" list, please contact us to setup a custom integration
- Once your integration syncs, an activity section will show how many emails push out daily to your third-party CRM
Still need assistance? Please reach out to your Customer Success Team or contact support@tradablebits.com